How to enable MMS messages on the Nokia C7 after joining Golan Telecom
This guide will show you how to enable MMS messages after joining Golan Telecom.
קל 1,068 צפיות
מה תצטרך
- MMS
- Golan MMS
- English
שלבים
- 1
שלב 1
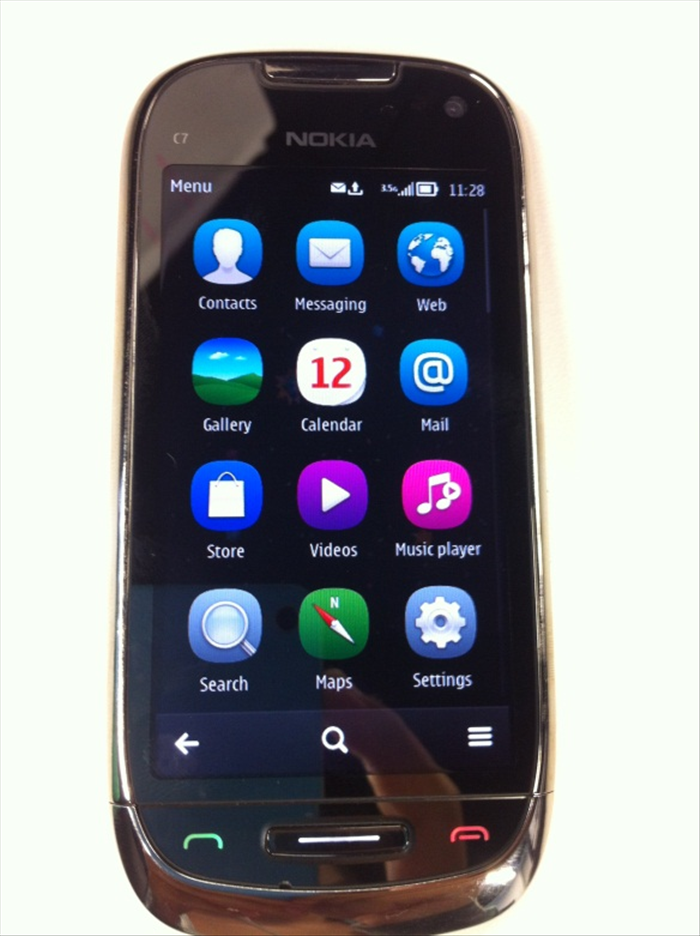 Press on the Menu bottom and then on "Settings".
 - 2
שלב 2
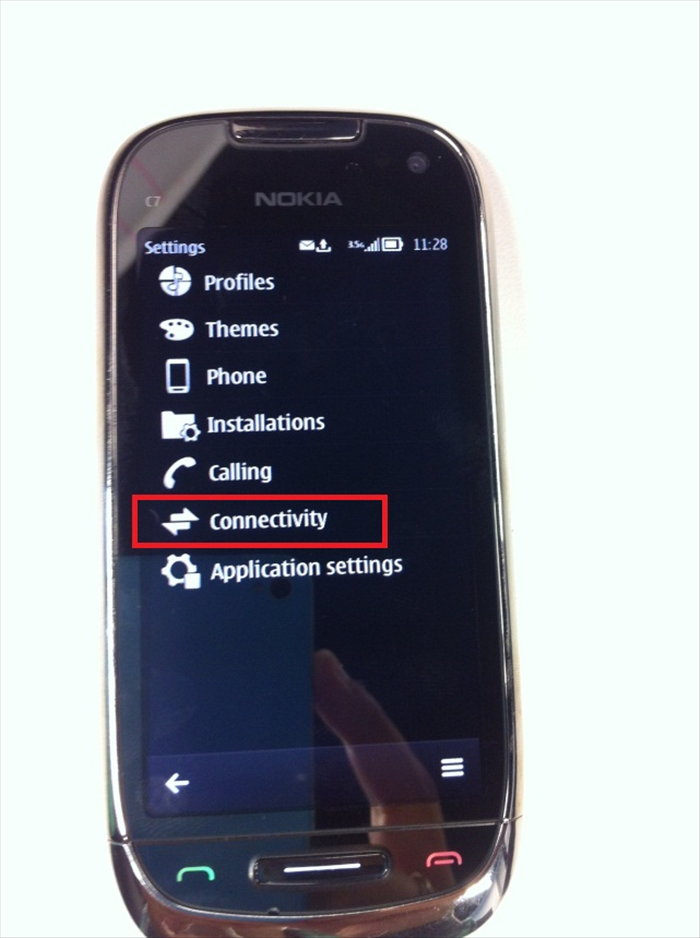 Press on the "Connectivity" button.
 -
- 3
שלב 3
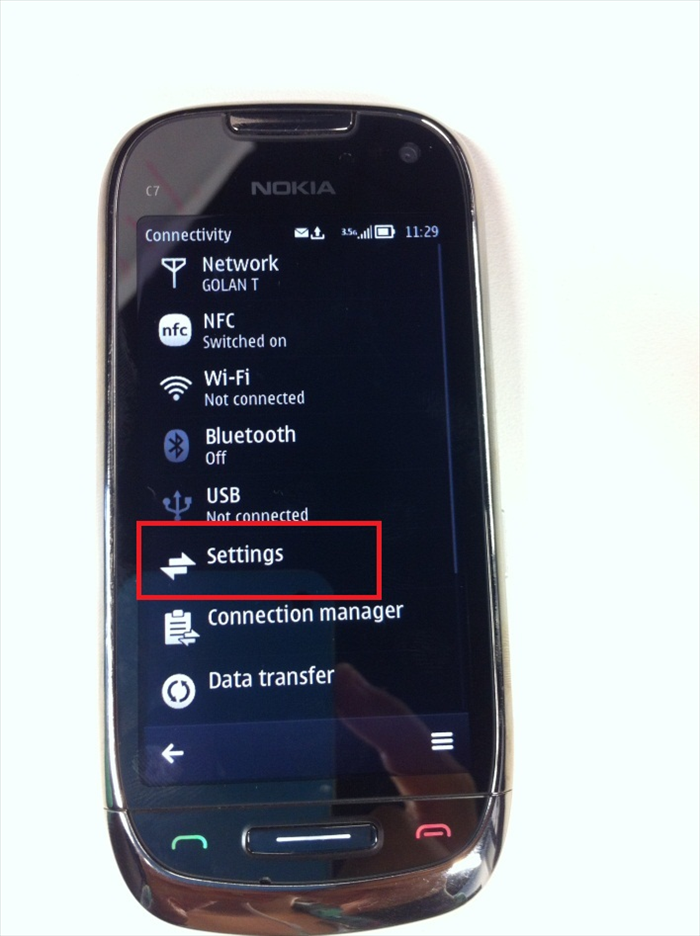 Press the "Settings" button.
 - 4
שלב 4
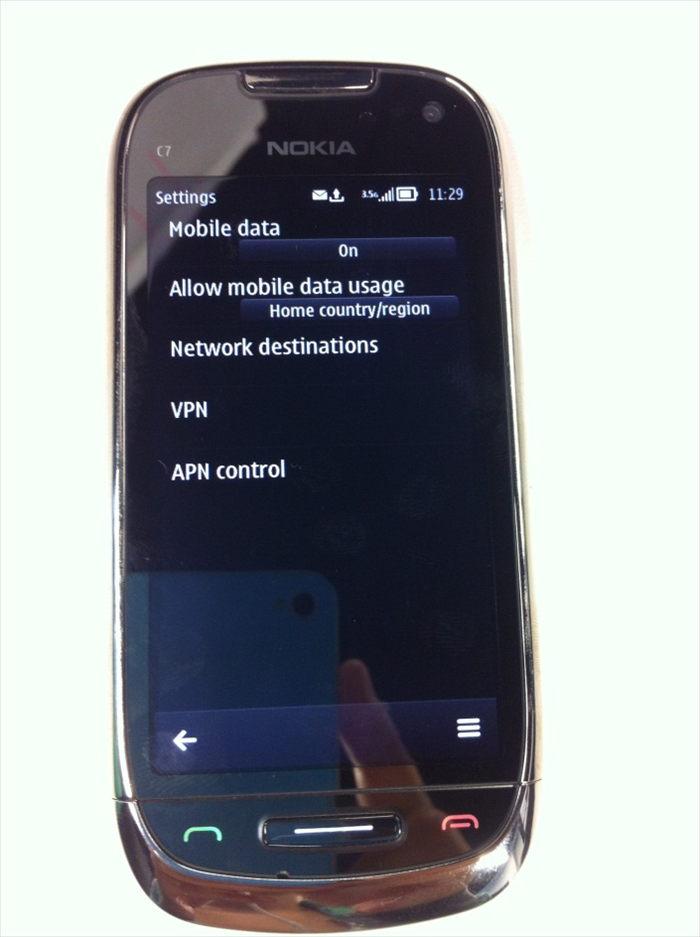 Allow mobile data usage: Home country/region And then choose: Network destinations
 - 5
שלב 5
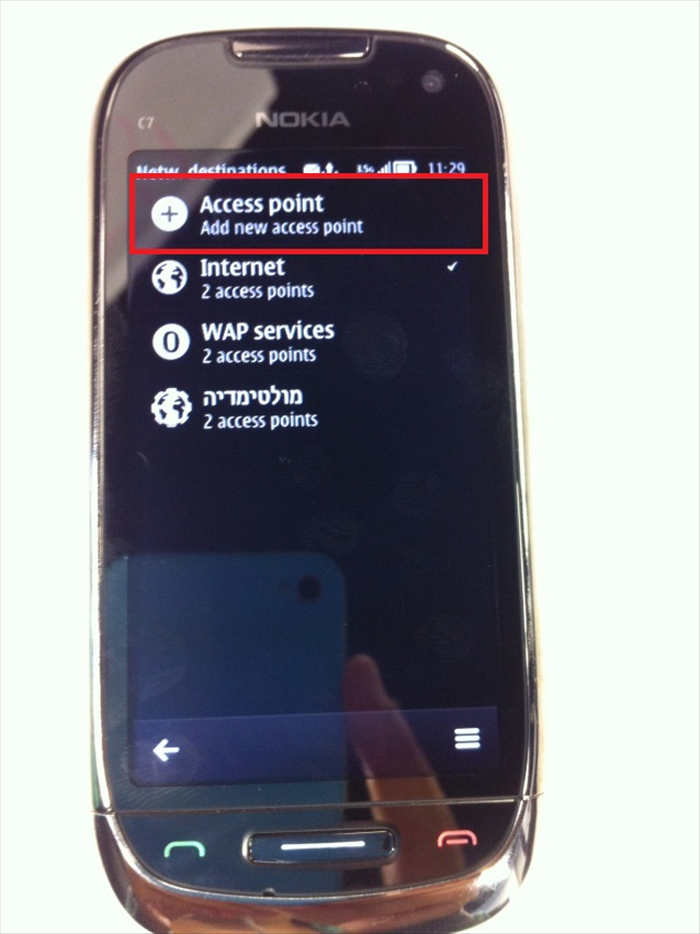 Press on "Access point, Add new access point"
 - 6
שלב 6
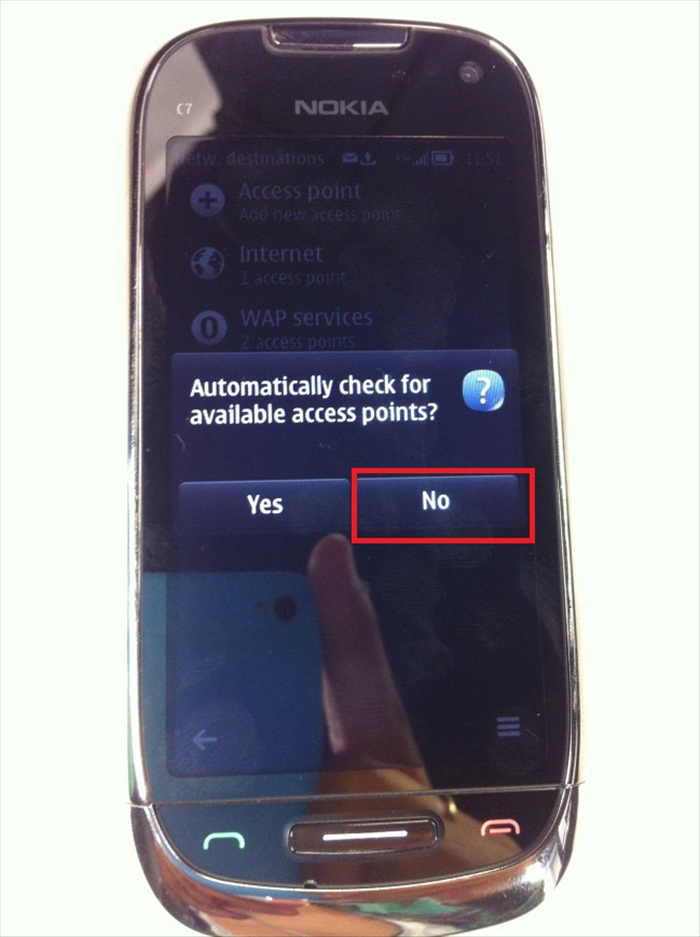 In the small window that pops up – "Automatically check for available access points?" Choose: No
 - 7
שלב 7
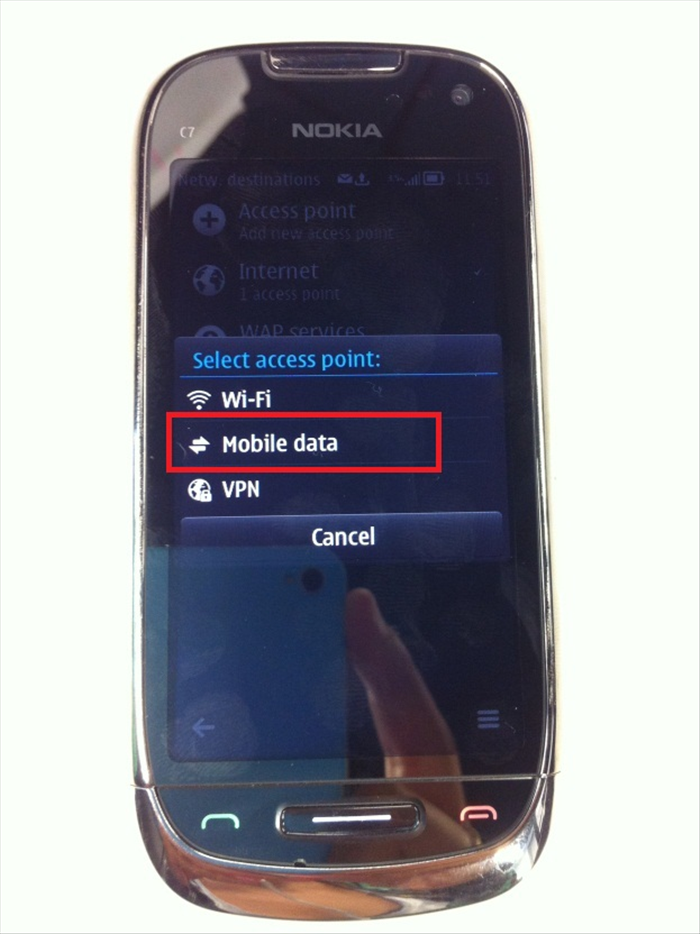 From the "Select access point" menu, choose Mobile data.
 - 8
שלב 8
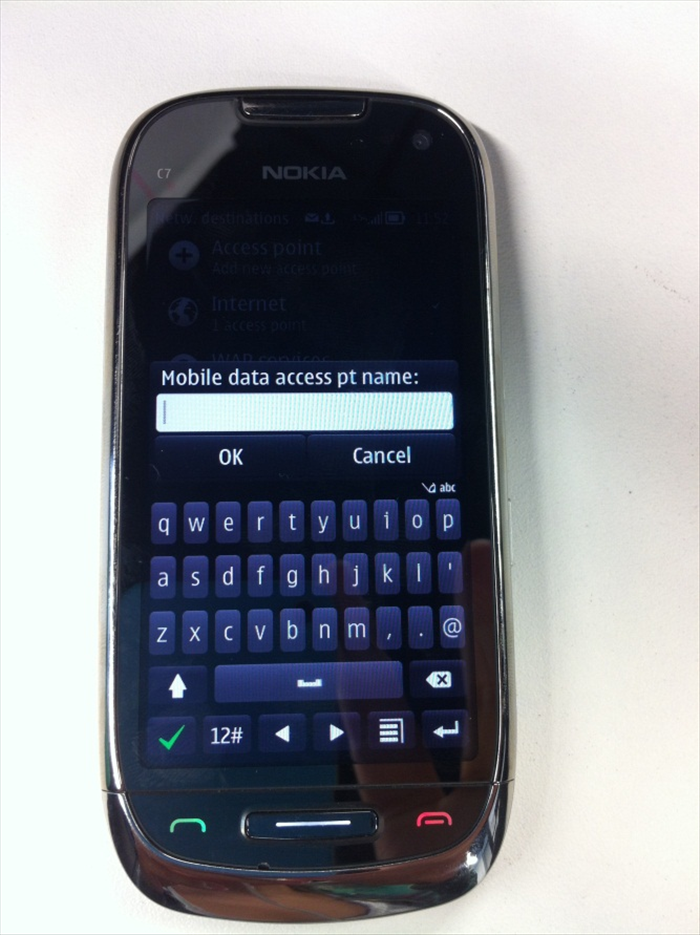 At Mobile data access pt name - type: GOLAN_MMS
 - 9
שלב 9
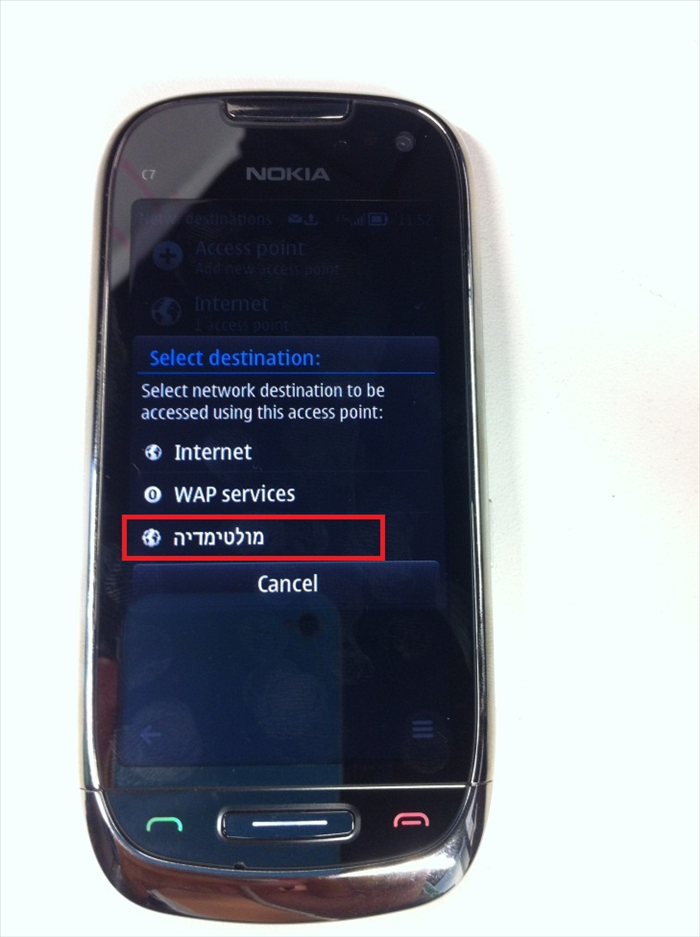 Select destination: מולטימדיה / Multimedia.
 - 10
שלב 10
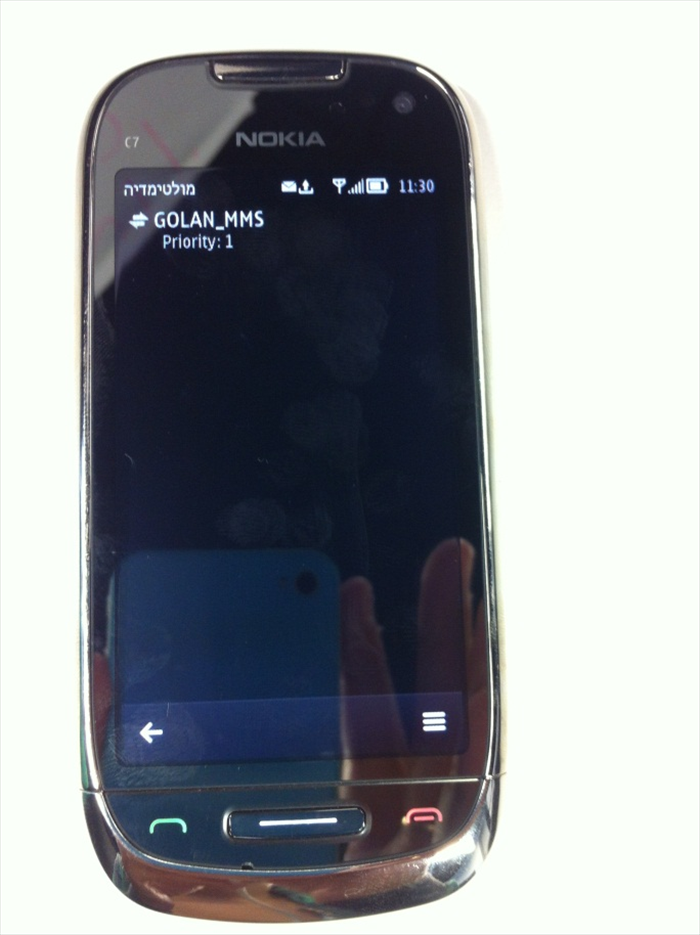 Press on "Settings" and then choose the APN that you've created: GOLAN_MMS
 - 11
שלב 11
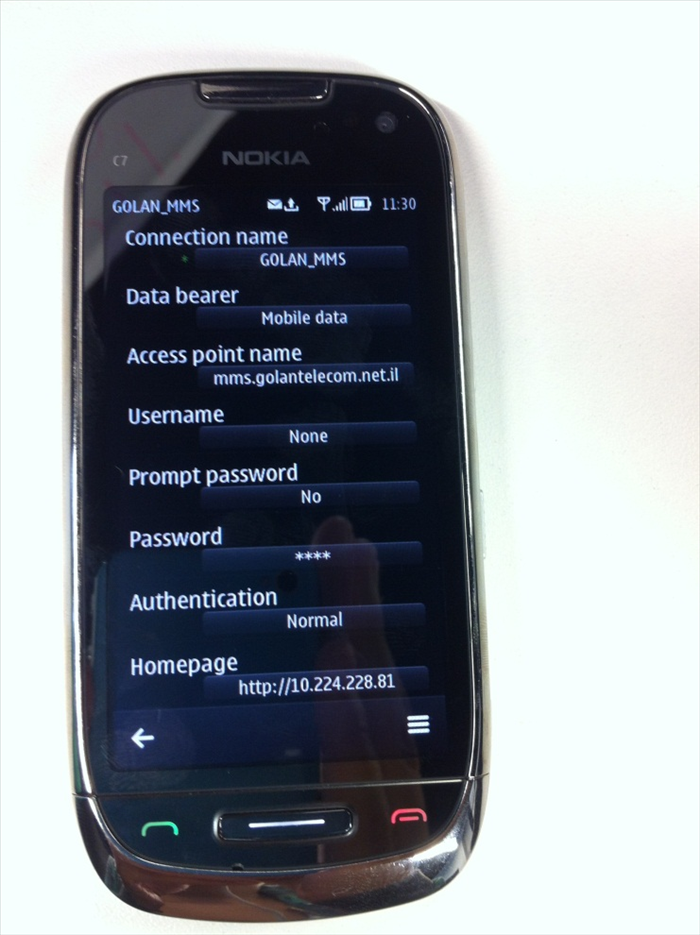 Type in the following settings: Connection name: GOLAN_MMS Access point name: mms.golantelecom.net.il Username: None Prompt password: No Password: none Authentication: Normal Home page: http://10.224.228.81
 - 12
שלב 12
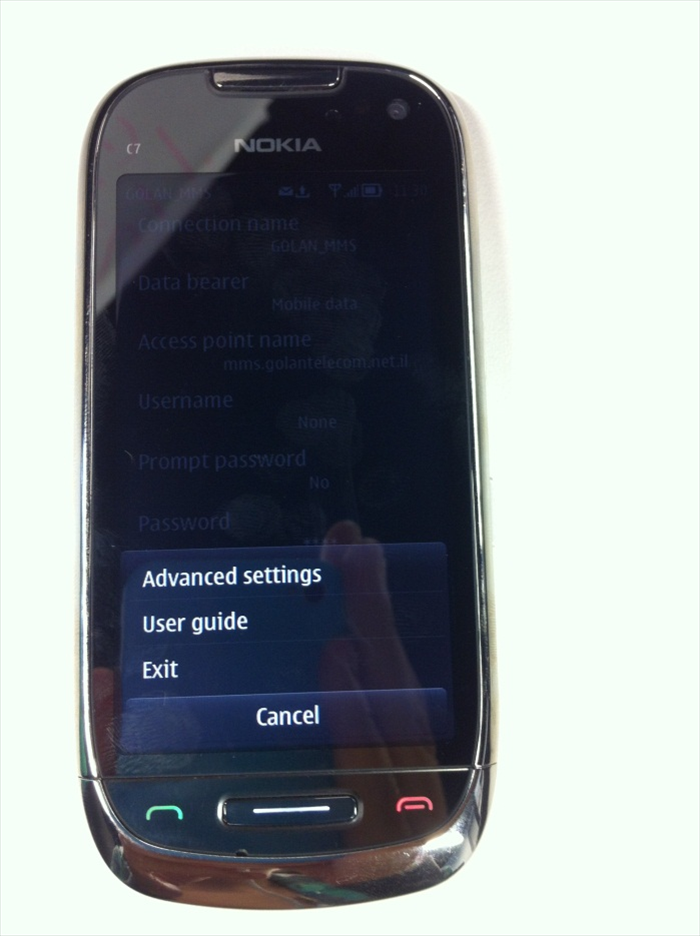 Press on the "options" botton on the right and Choose "Advanced settings"
 - 13
שלב 13
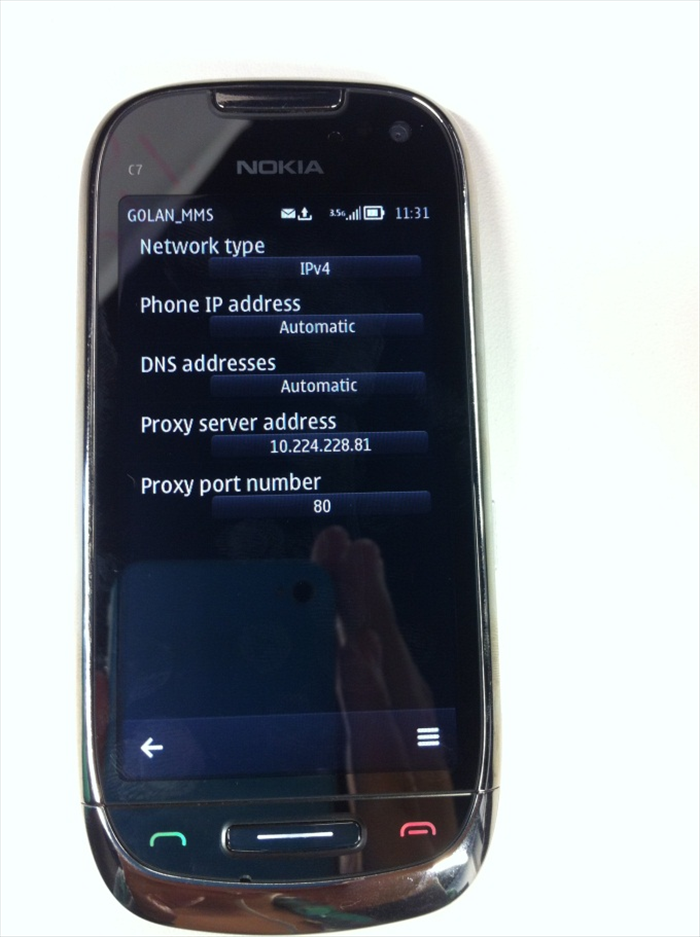 Type in the following settings : Network type: choose IPV4 Phone IP address: Automatic DNS addresss: Automatic Proxy server address: 10.224.228.81 Proxy port number: 80